
Log Explorer
The Log Explorer is the primary interface for searching, filtering, and analyzing logs collected across your entire infrastructure. Whether you are running Kubernetes workloads, virtual machines, or bare-metal servers, the Log Explorer gives you a unified view of every log line ingested by KubeSense — with millisecond-precision timestamps, powerful search capabilities, and deep correlation with traces and infrastructure metrics.
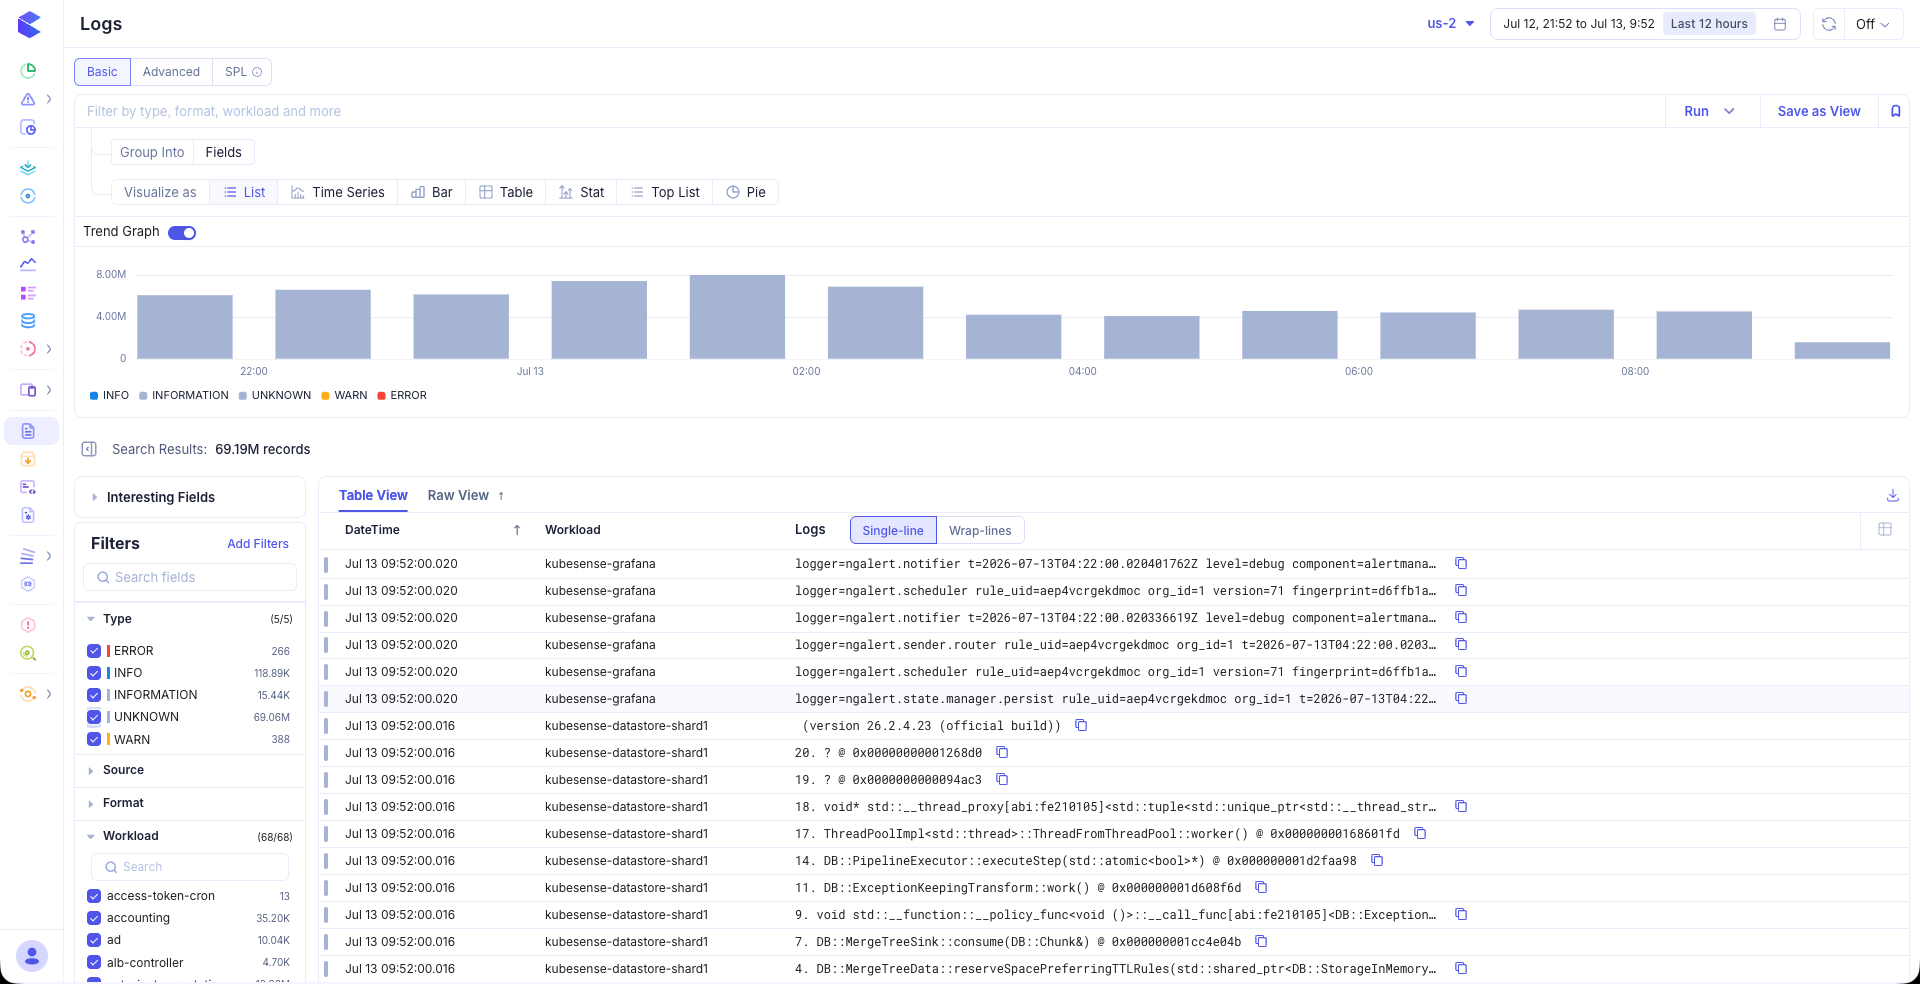
Overview
The Log Explorer supports three search modes:
- Basic — Tag-based filters and free-text search for quick lookups (e.g.
type:ERROR namespace:sre-agent) - Advanced — SQL-like queries with operators and logical connectors for precise filtering
- SPL — Pipe-based Search Processing Language for aggregations, analytics, and multi-stage pipelines
At the top of the page, you will find the search bar, time range picker, and view toggles. The left sidebar contains the filter panel and Interesting Fields section. The main content area displays your log data in the selected view mode.
You can also build custom dashboard-style visualizations directly in the Log Explorer — using the same panel configuration as the Data Explorer. Aggregate and group results, pick a visualization, configure it with Panel Options, and Save as View for later reuse.
Visualize As
Under Visualize as, choose how to display your log query results. These options match the panel types available in the Data Explorer.
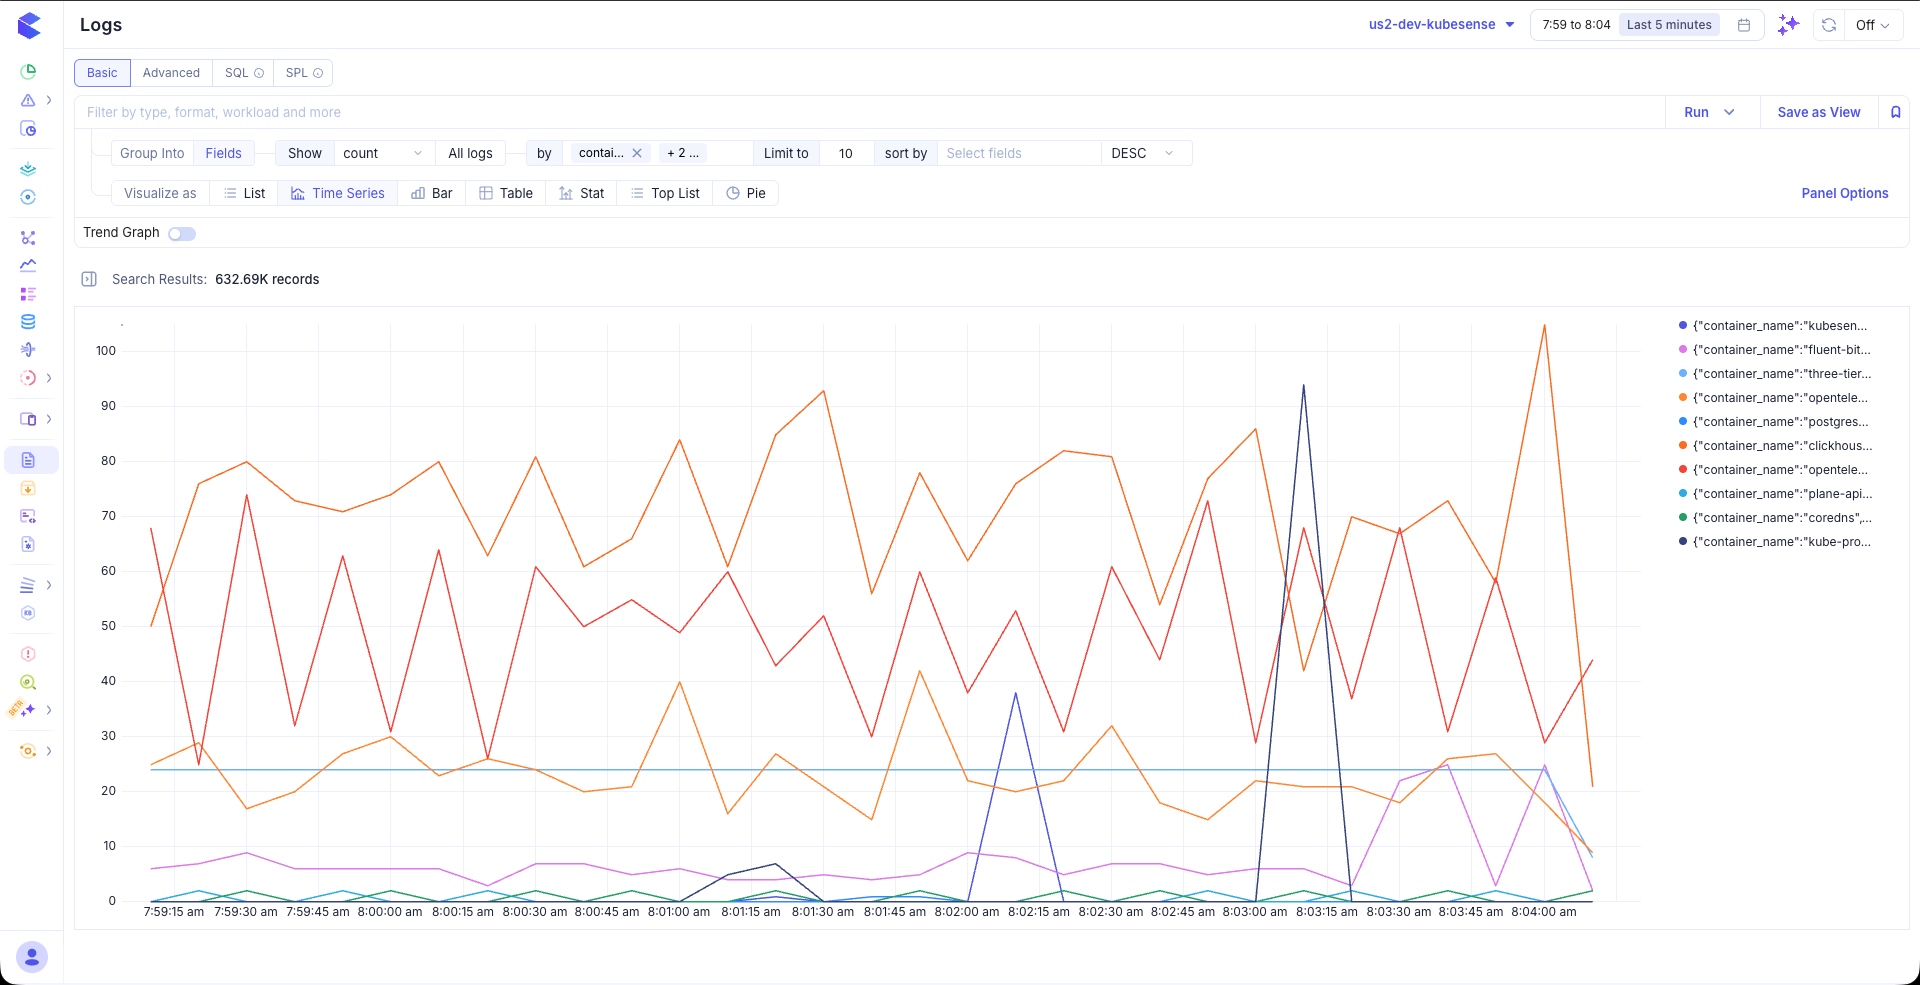
Time Series
Plots log volume and trends over time. Group by attributes such as container_name to compare series side by side.
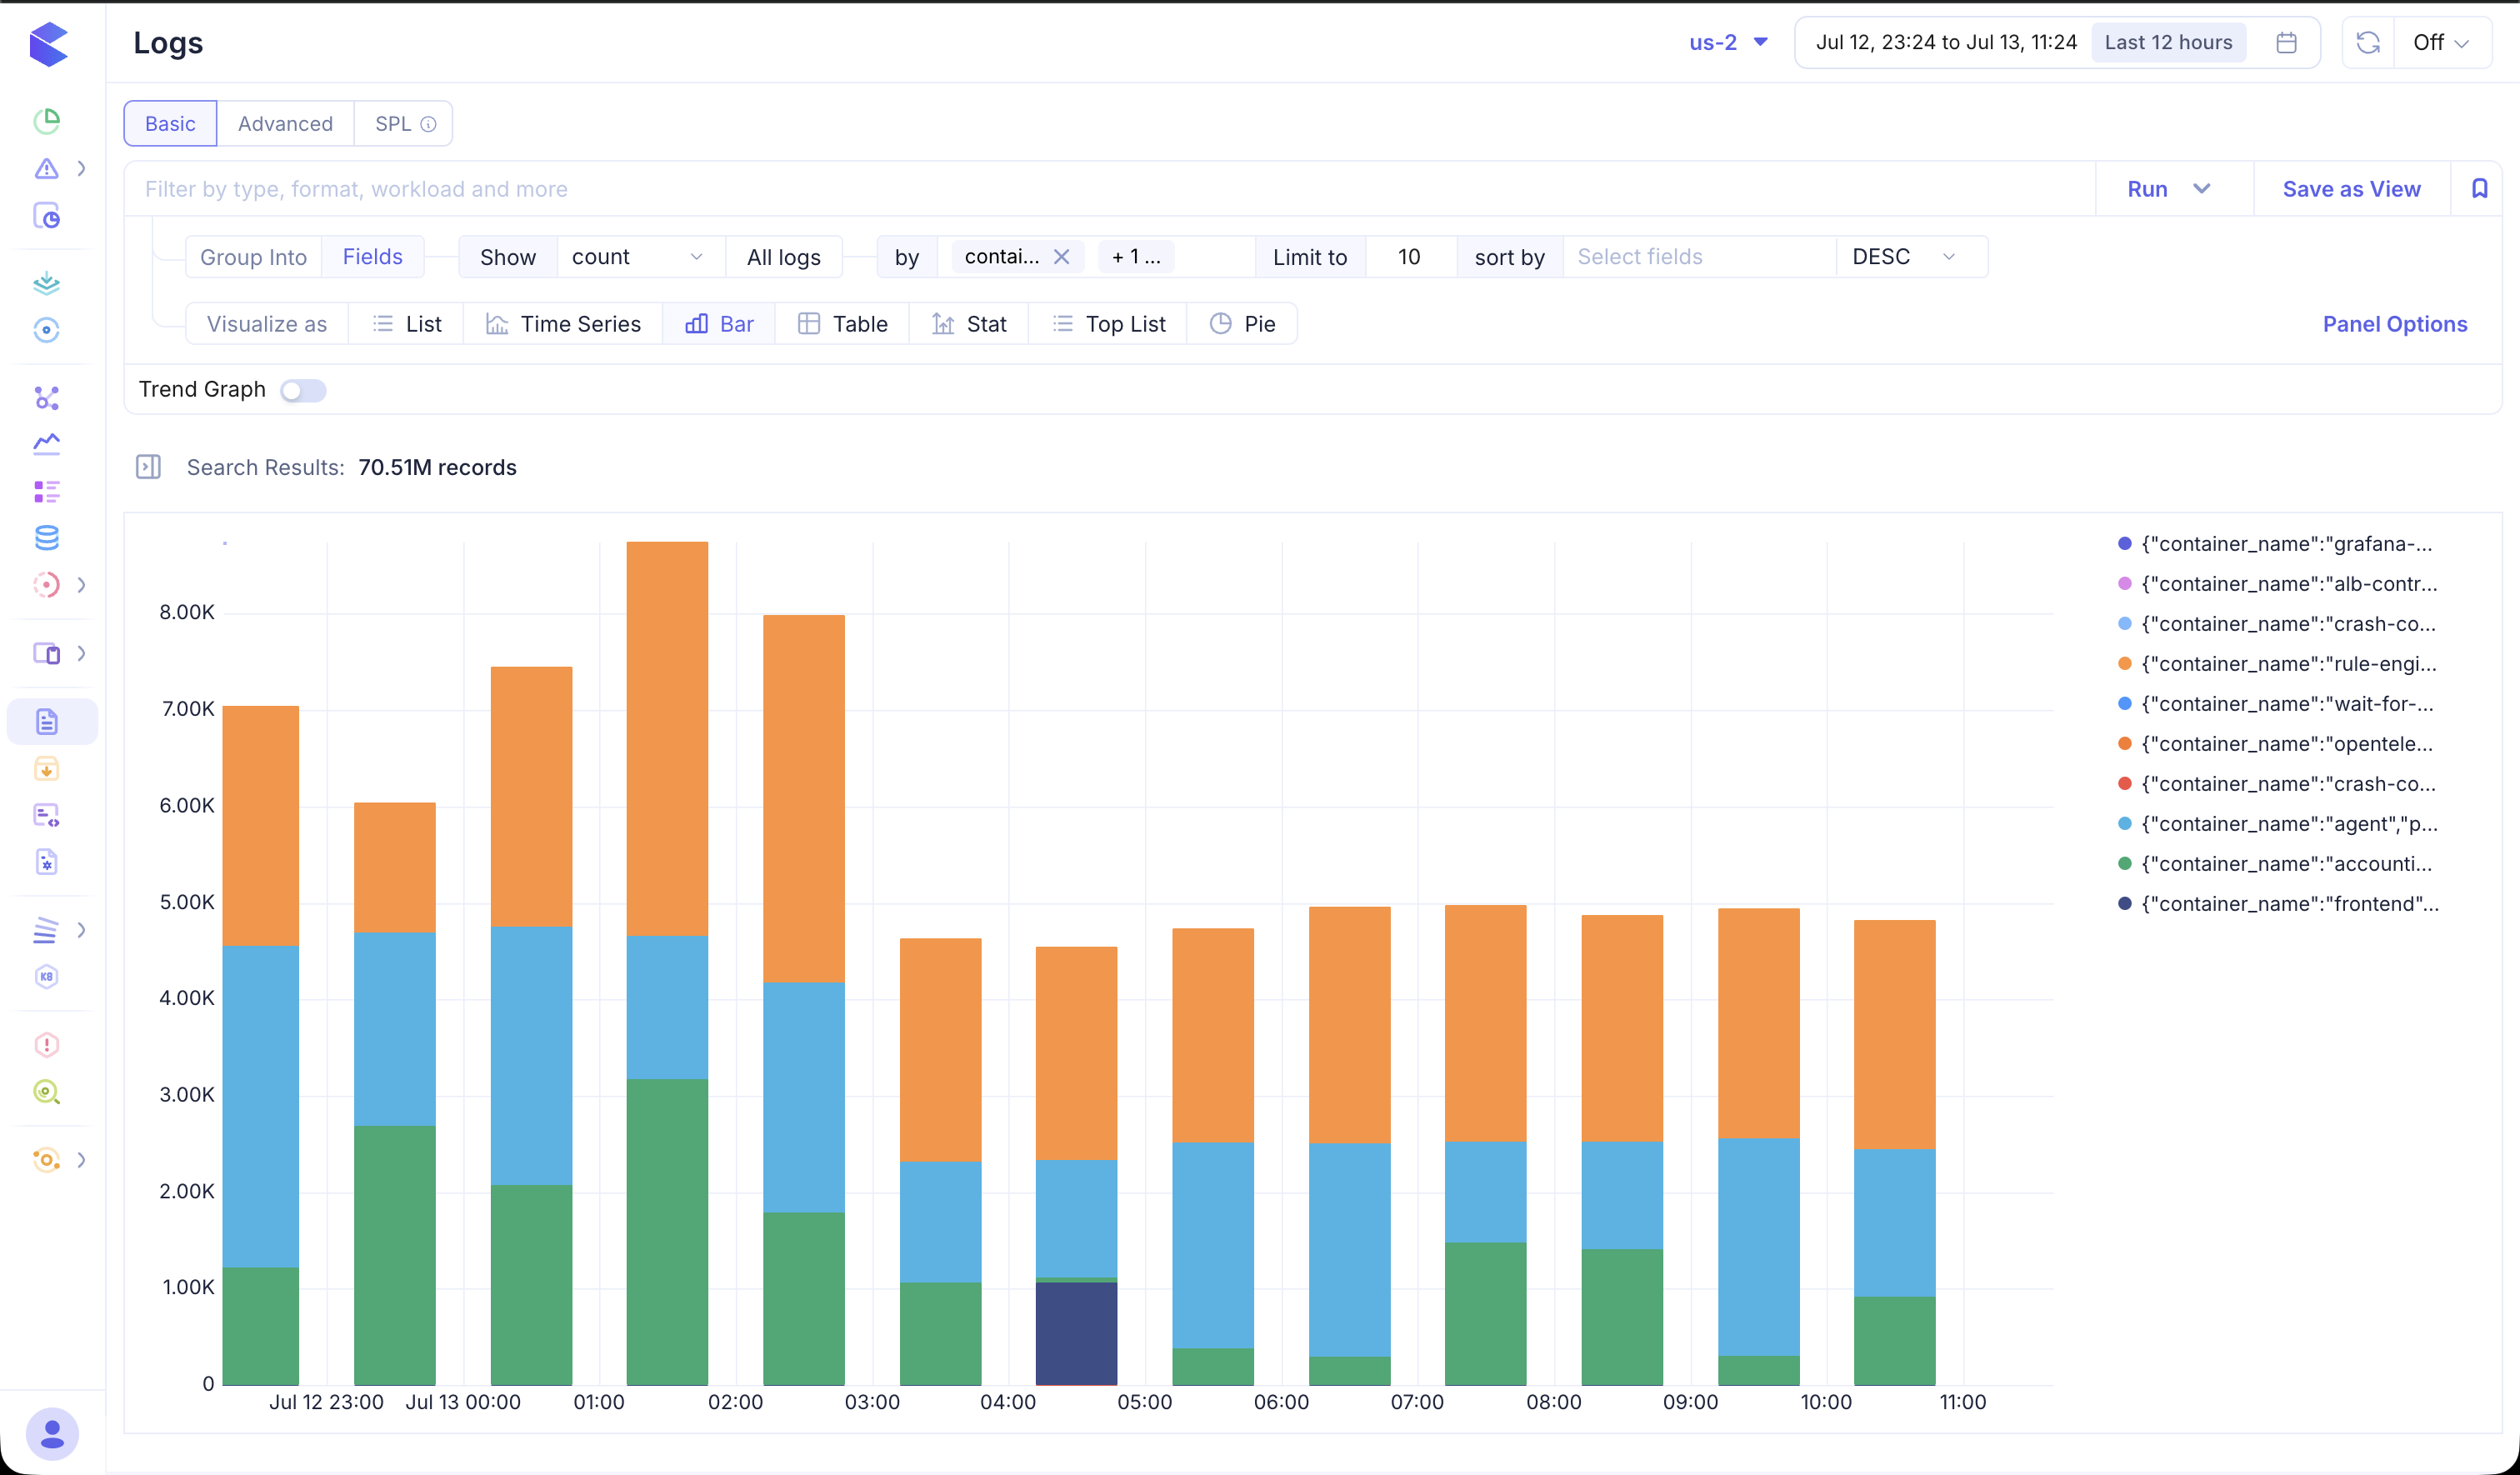
Bar
Compares aggregated values across categories, such as log counts by workload or container.
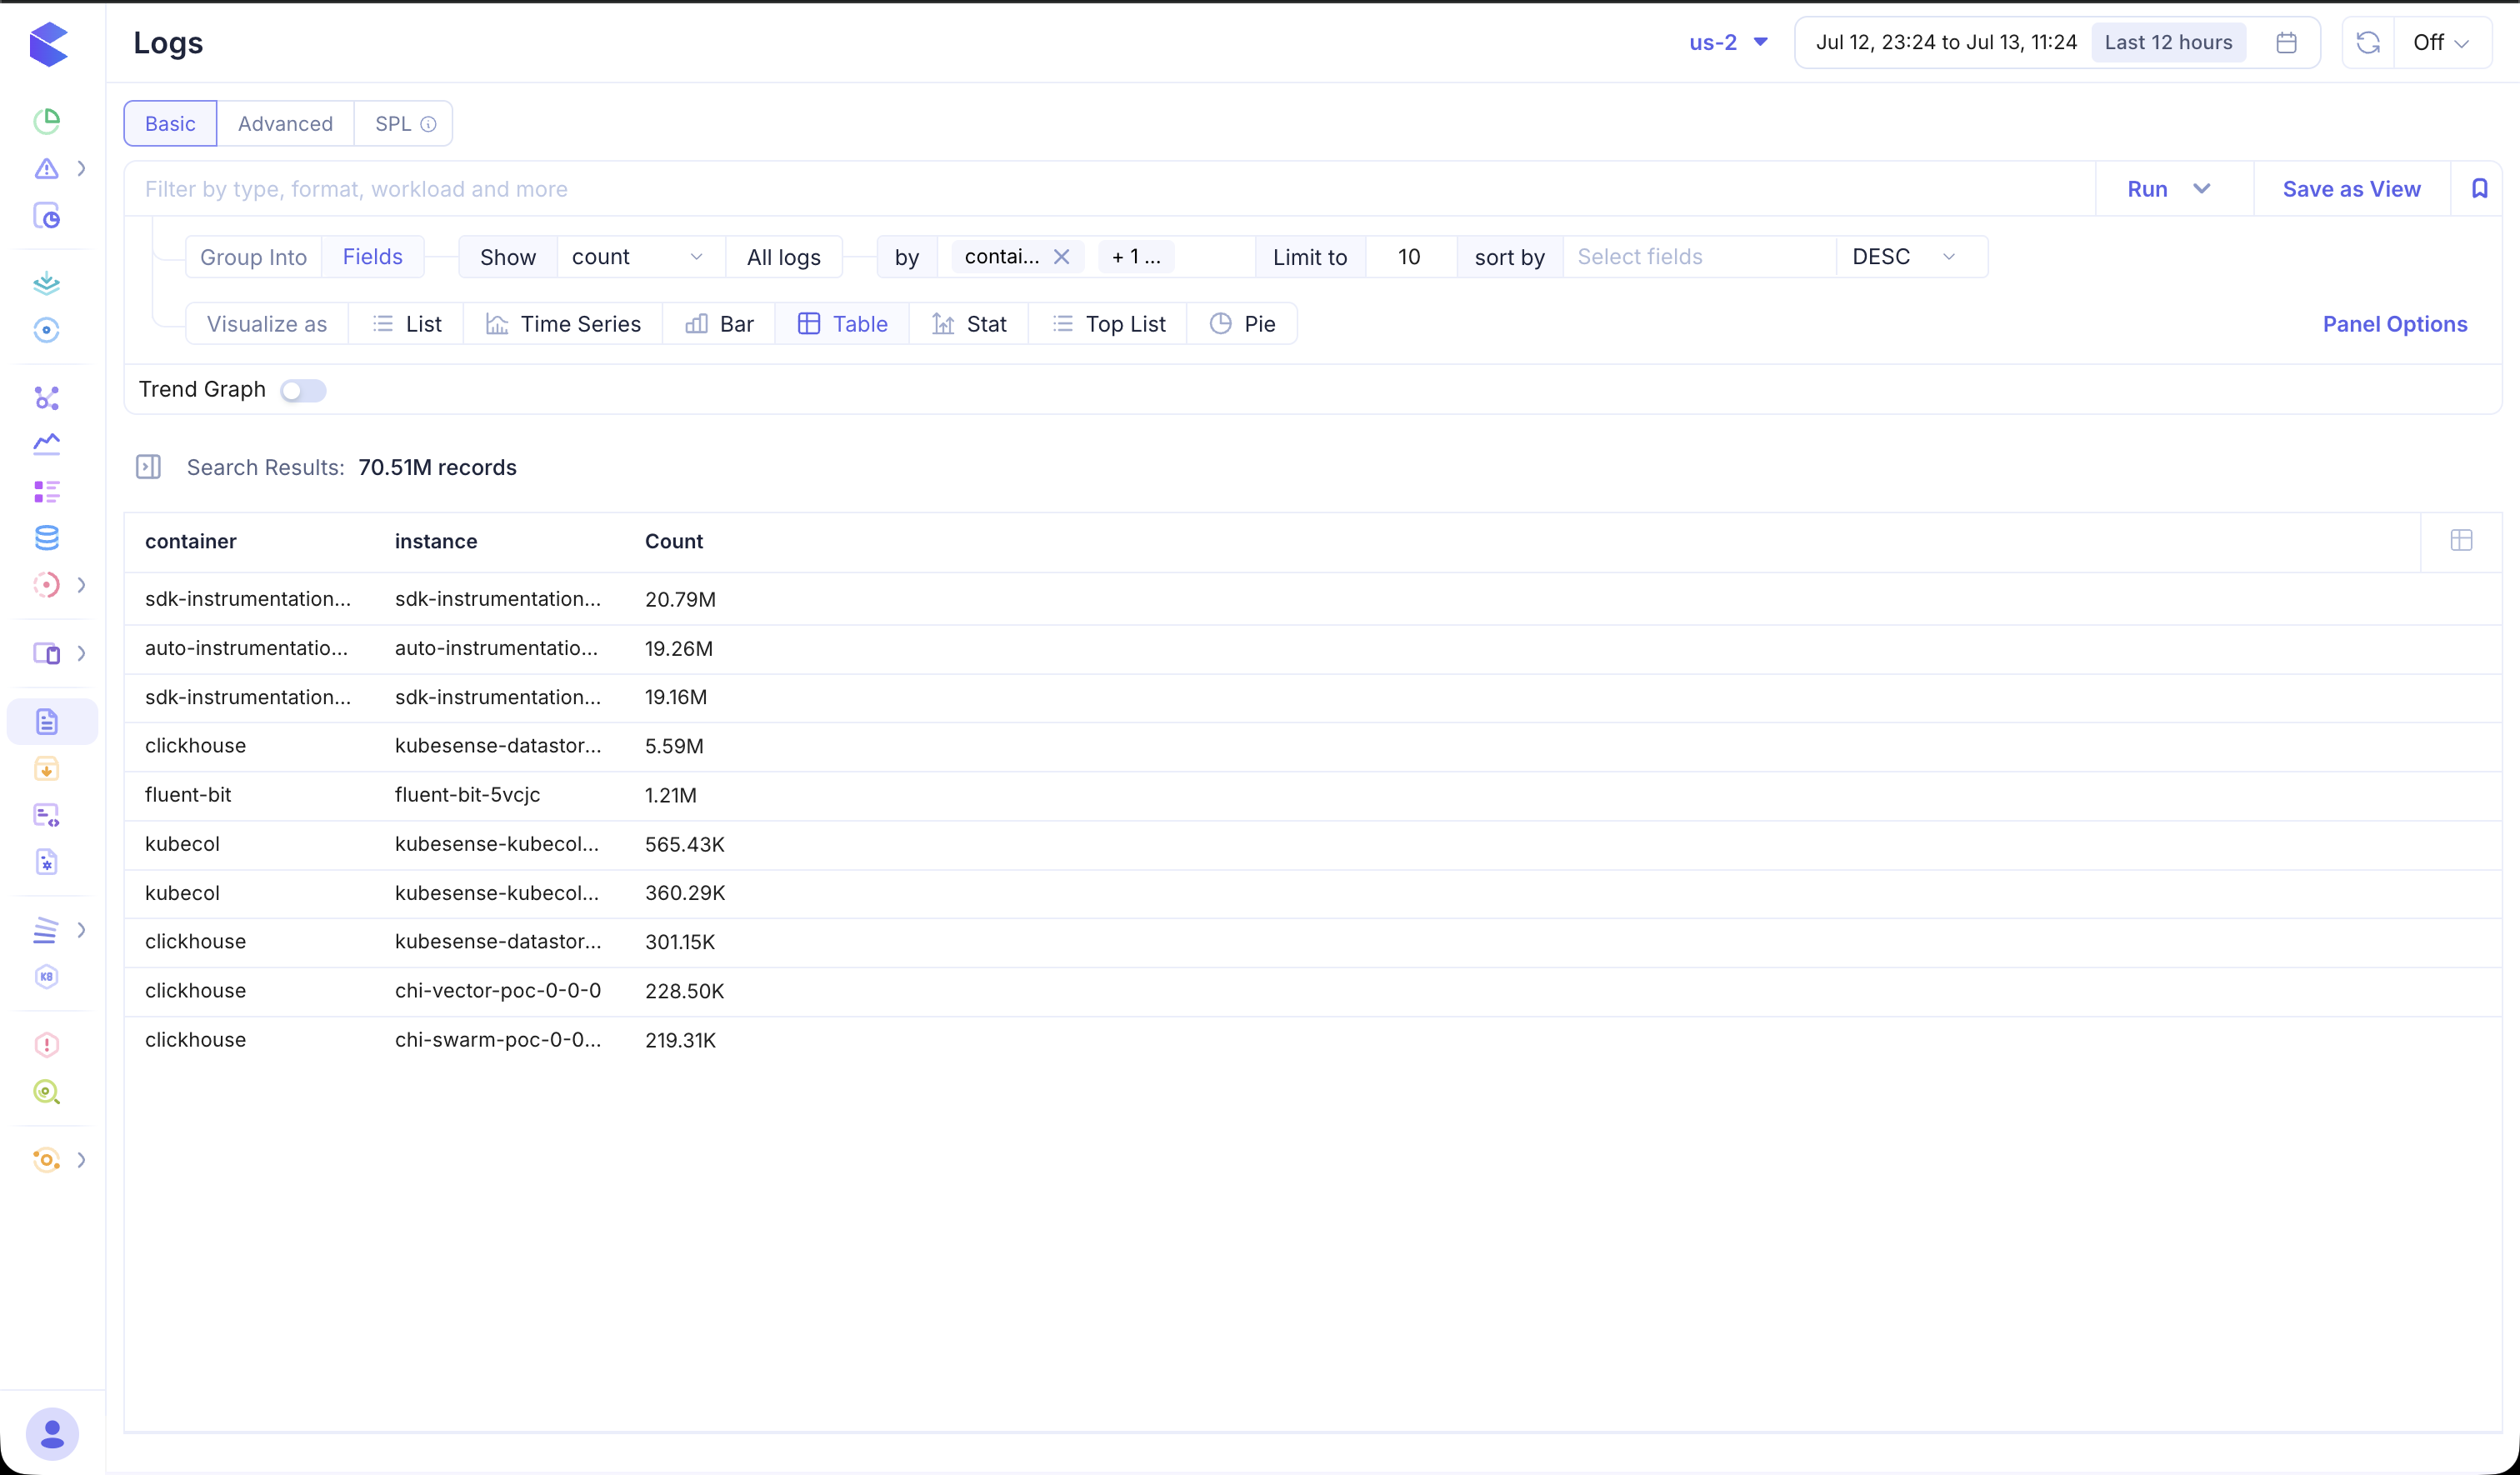
Table
Shows aggregated results in rows and columns for detailed inspection.
Stat
Displays single-value KPIs and summary numbers from your query.
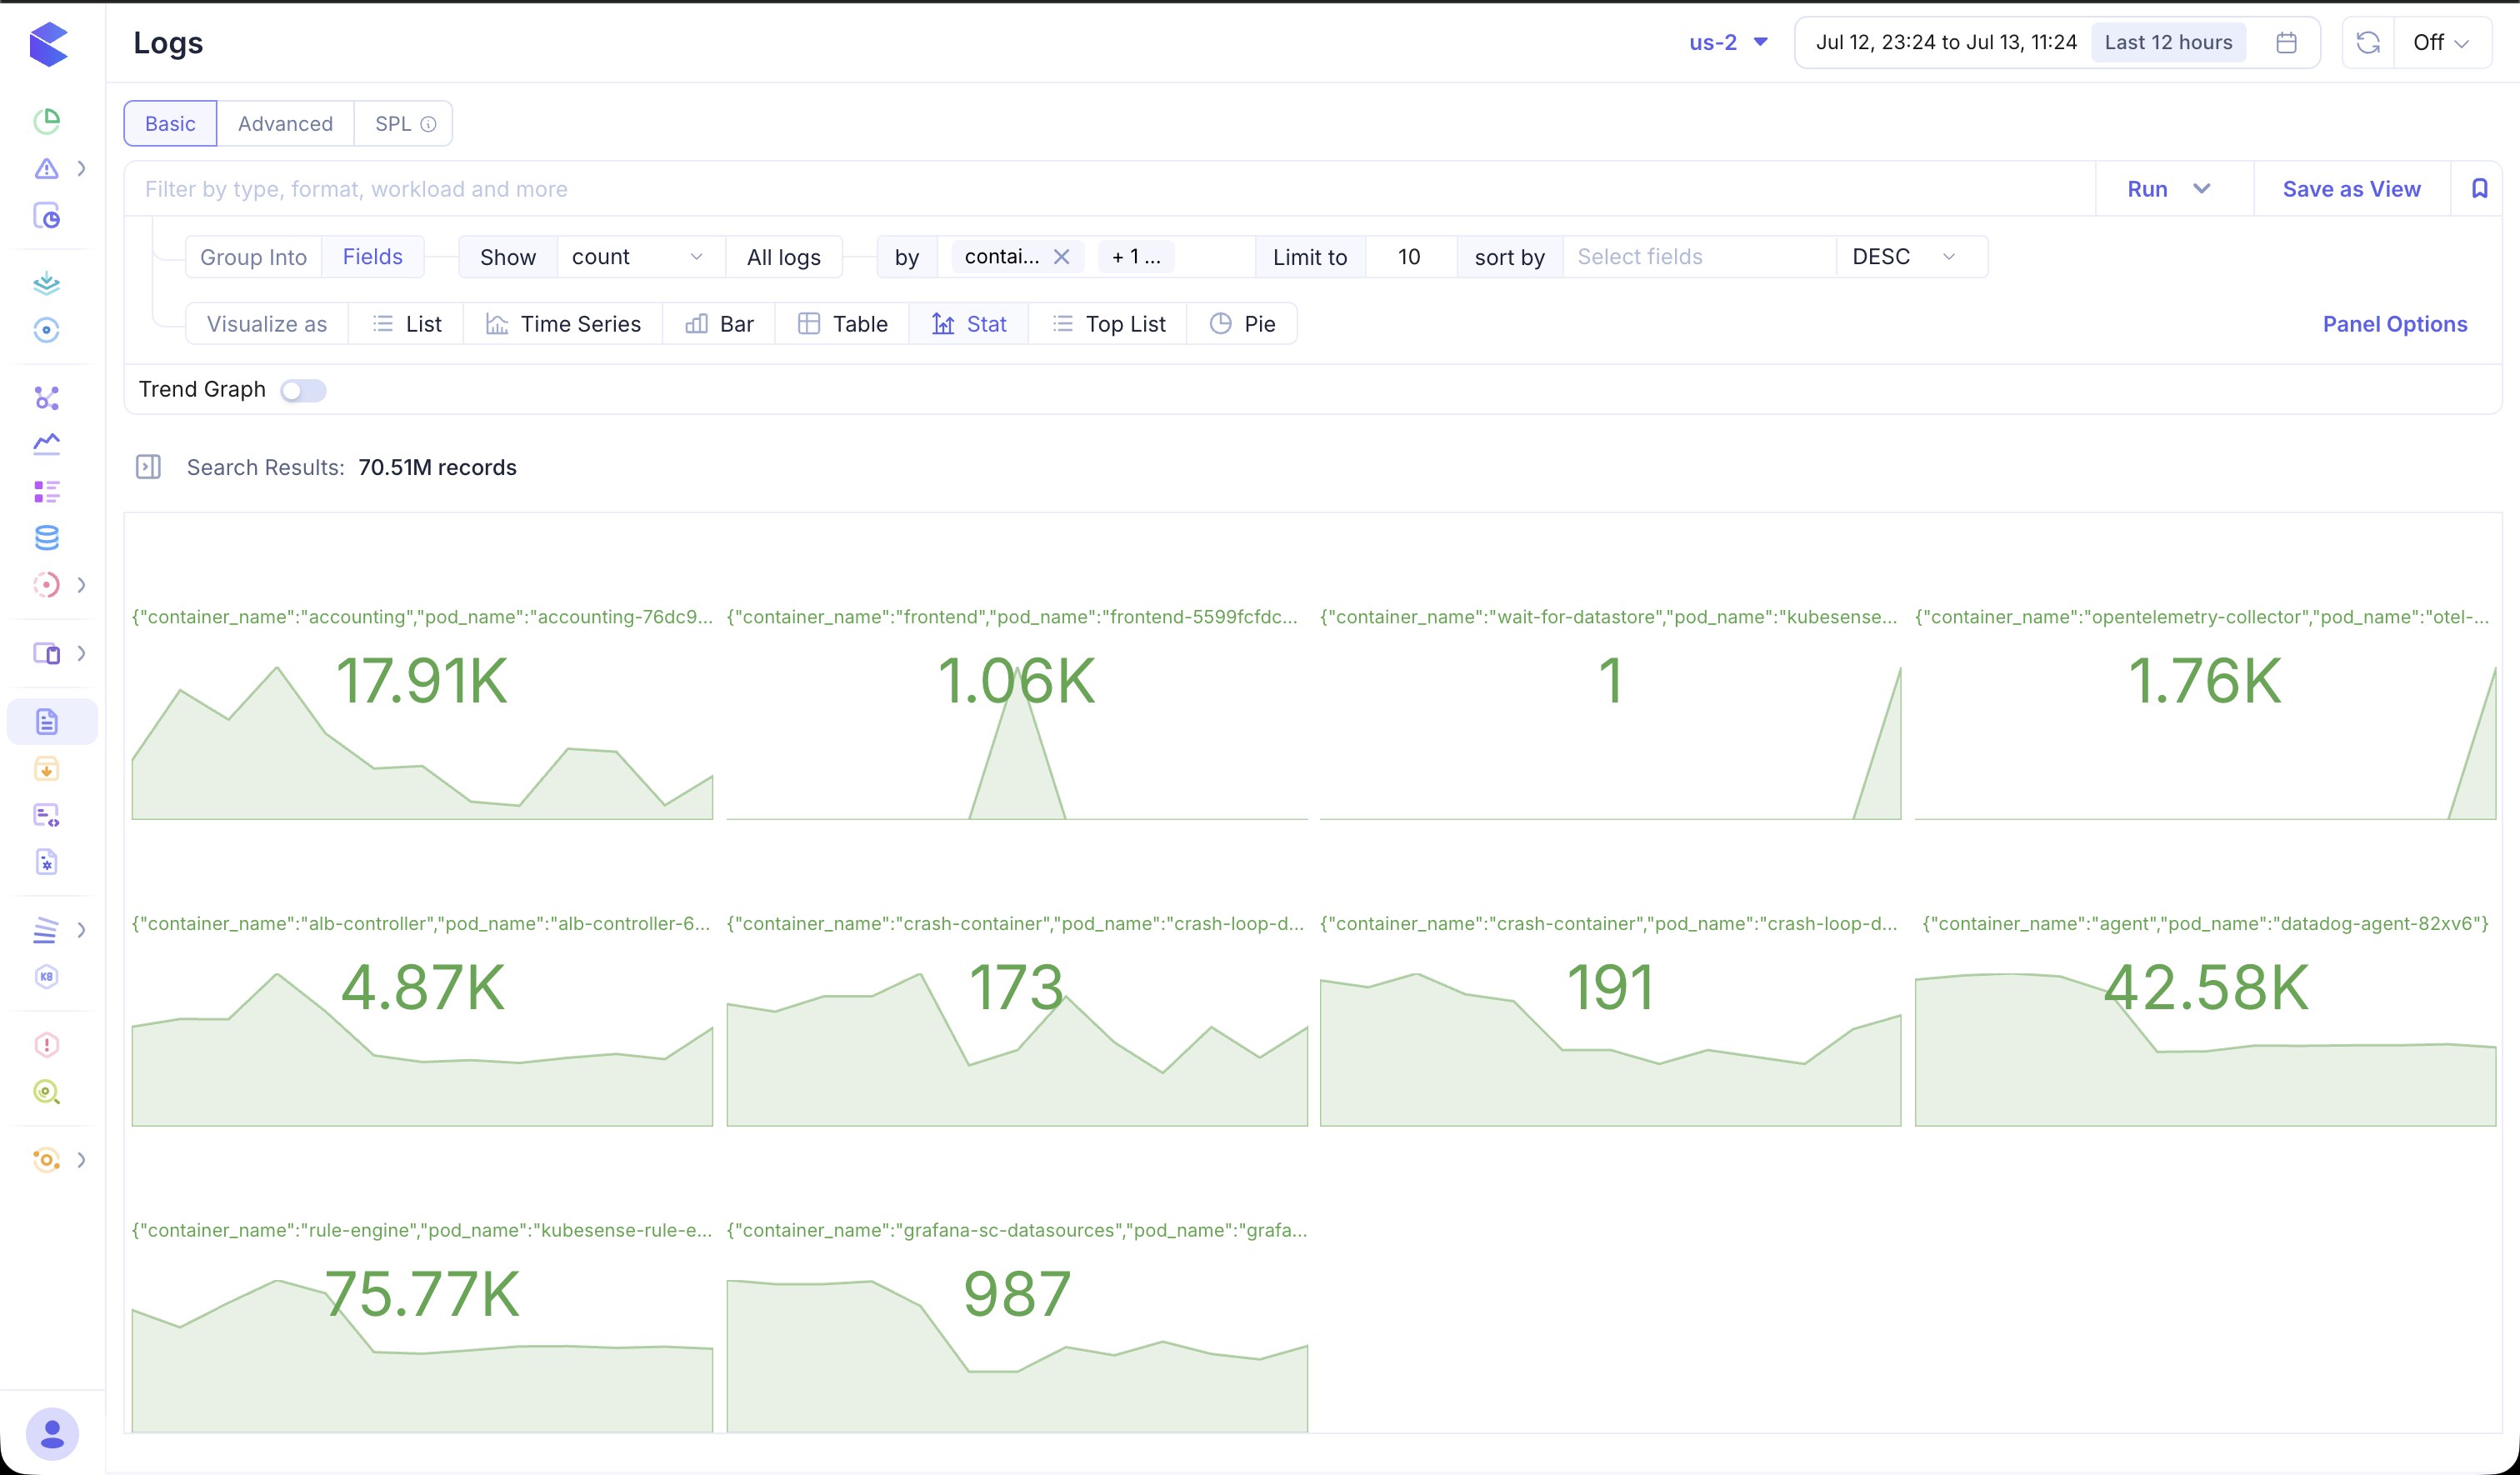
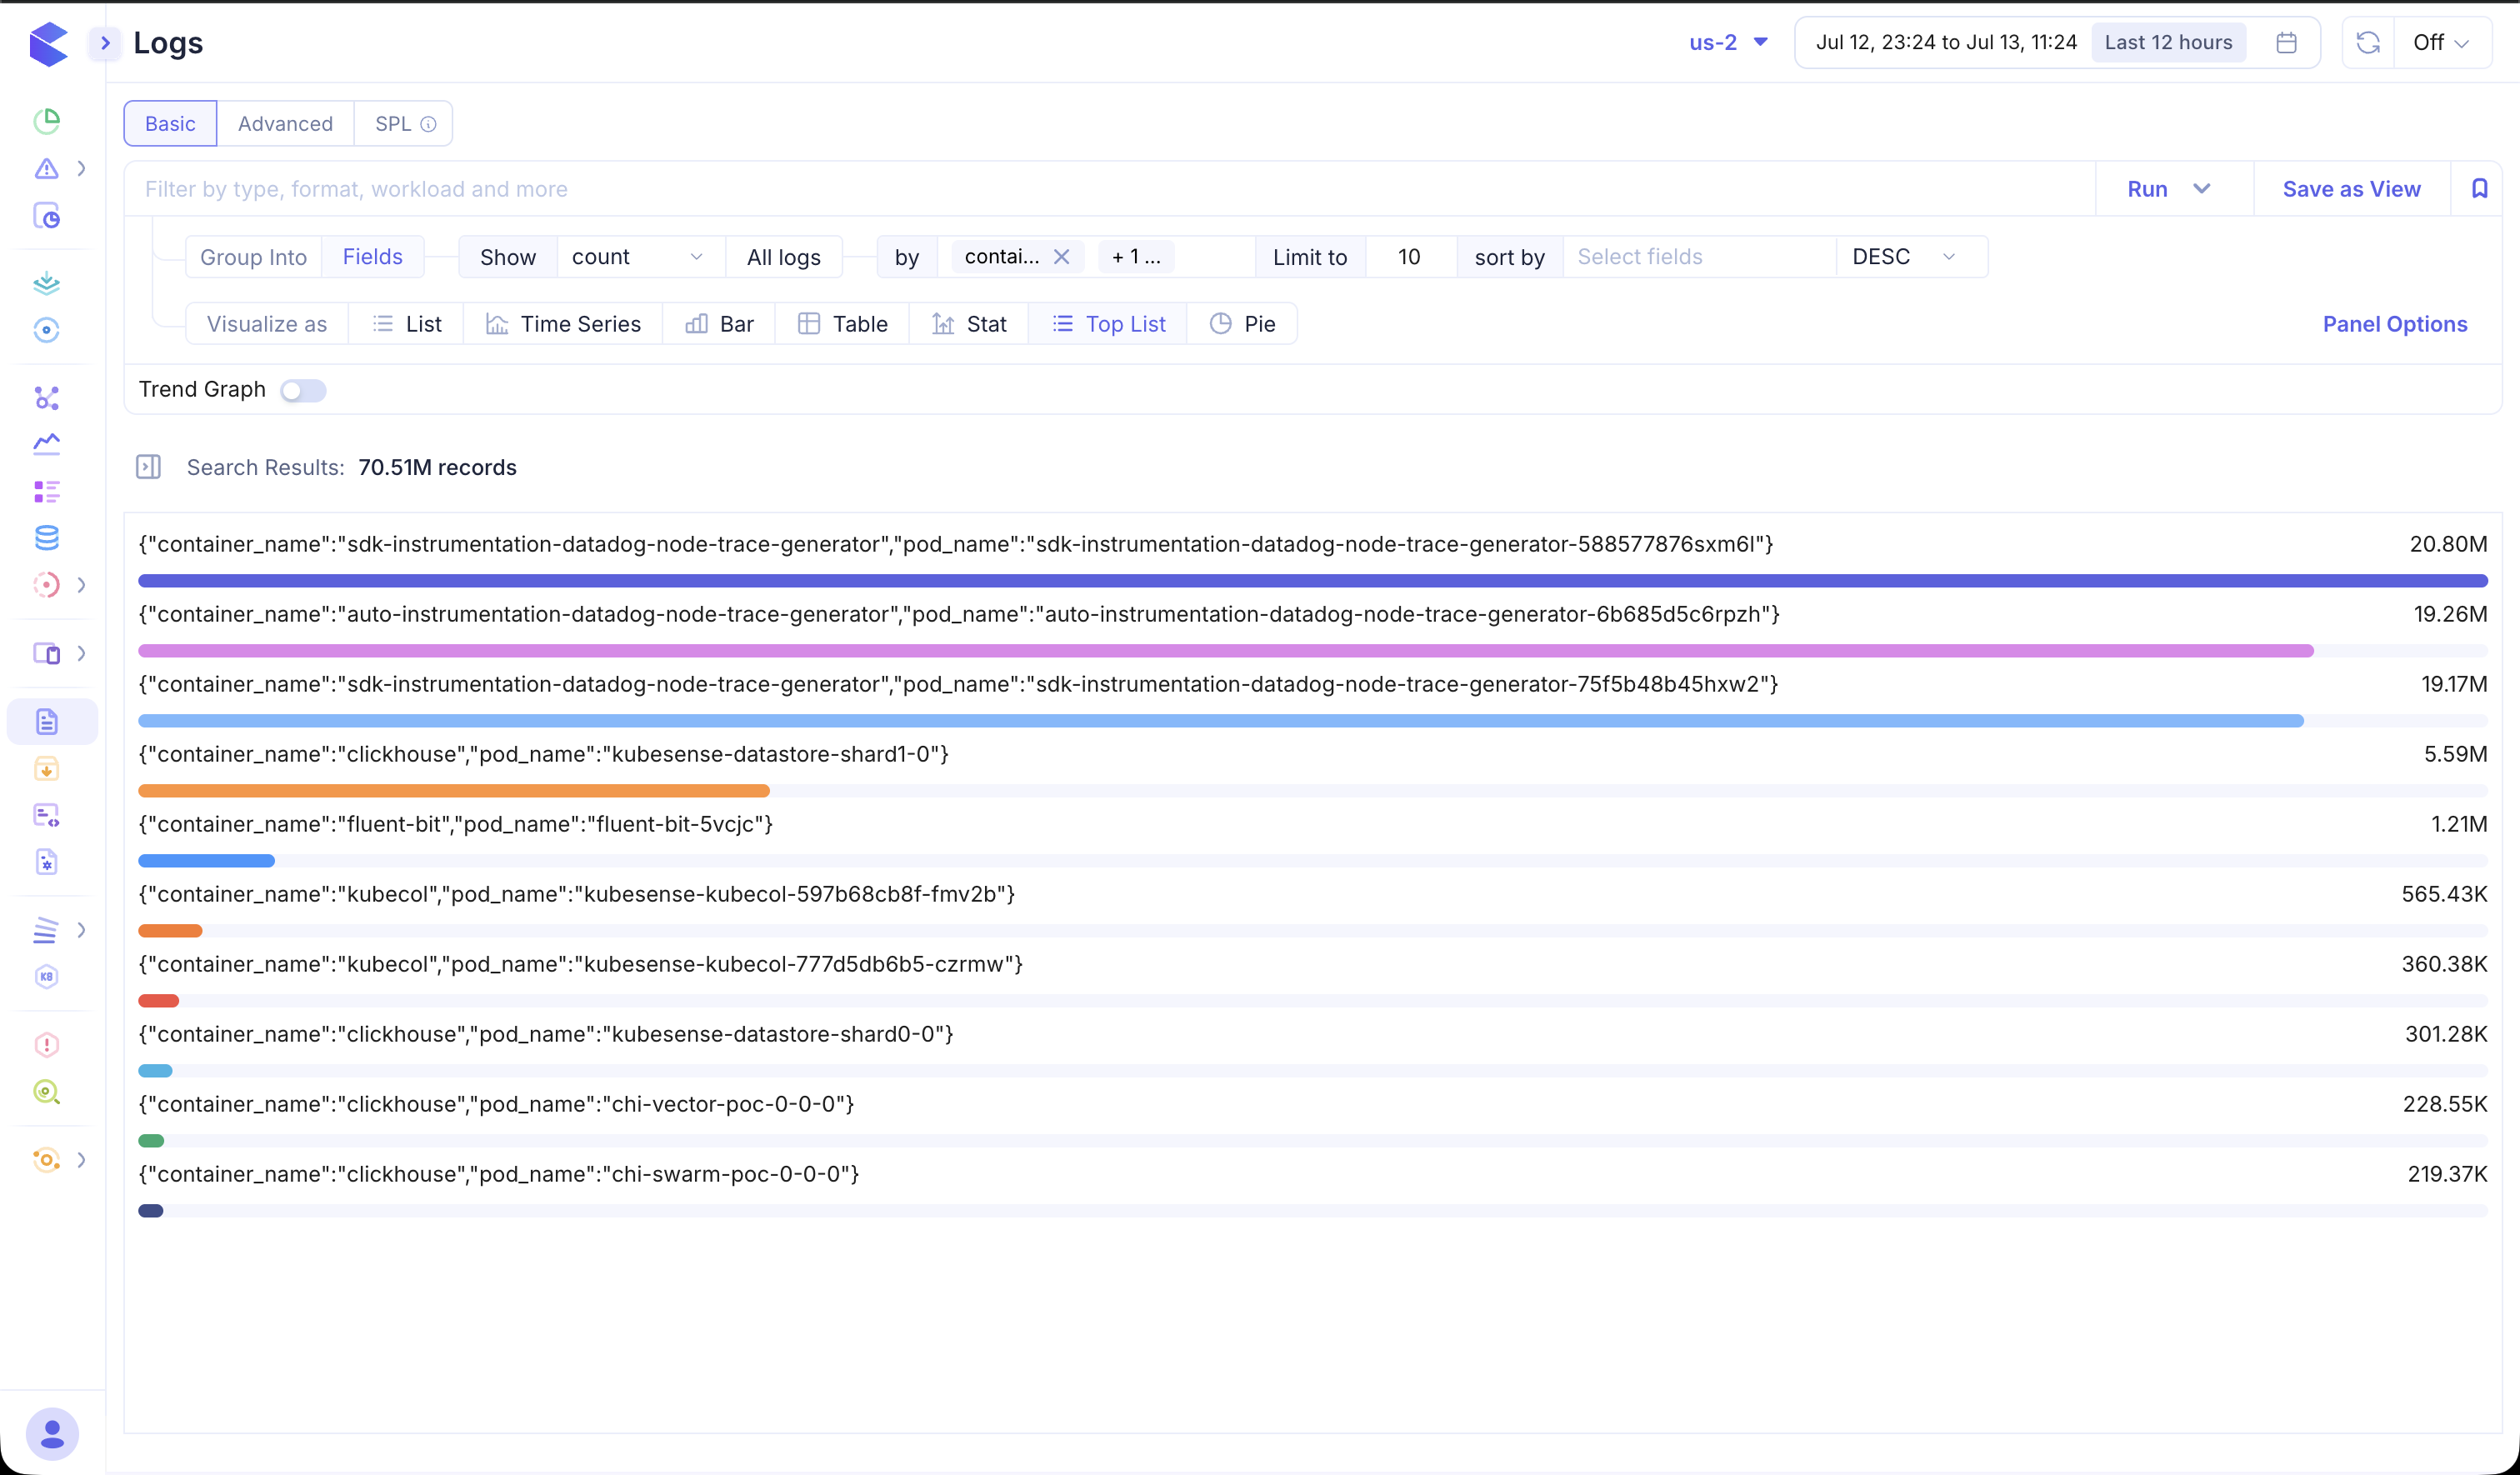
Top List
Ranks items by count or value — for example, the noisiest containers or nodes.
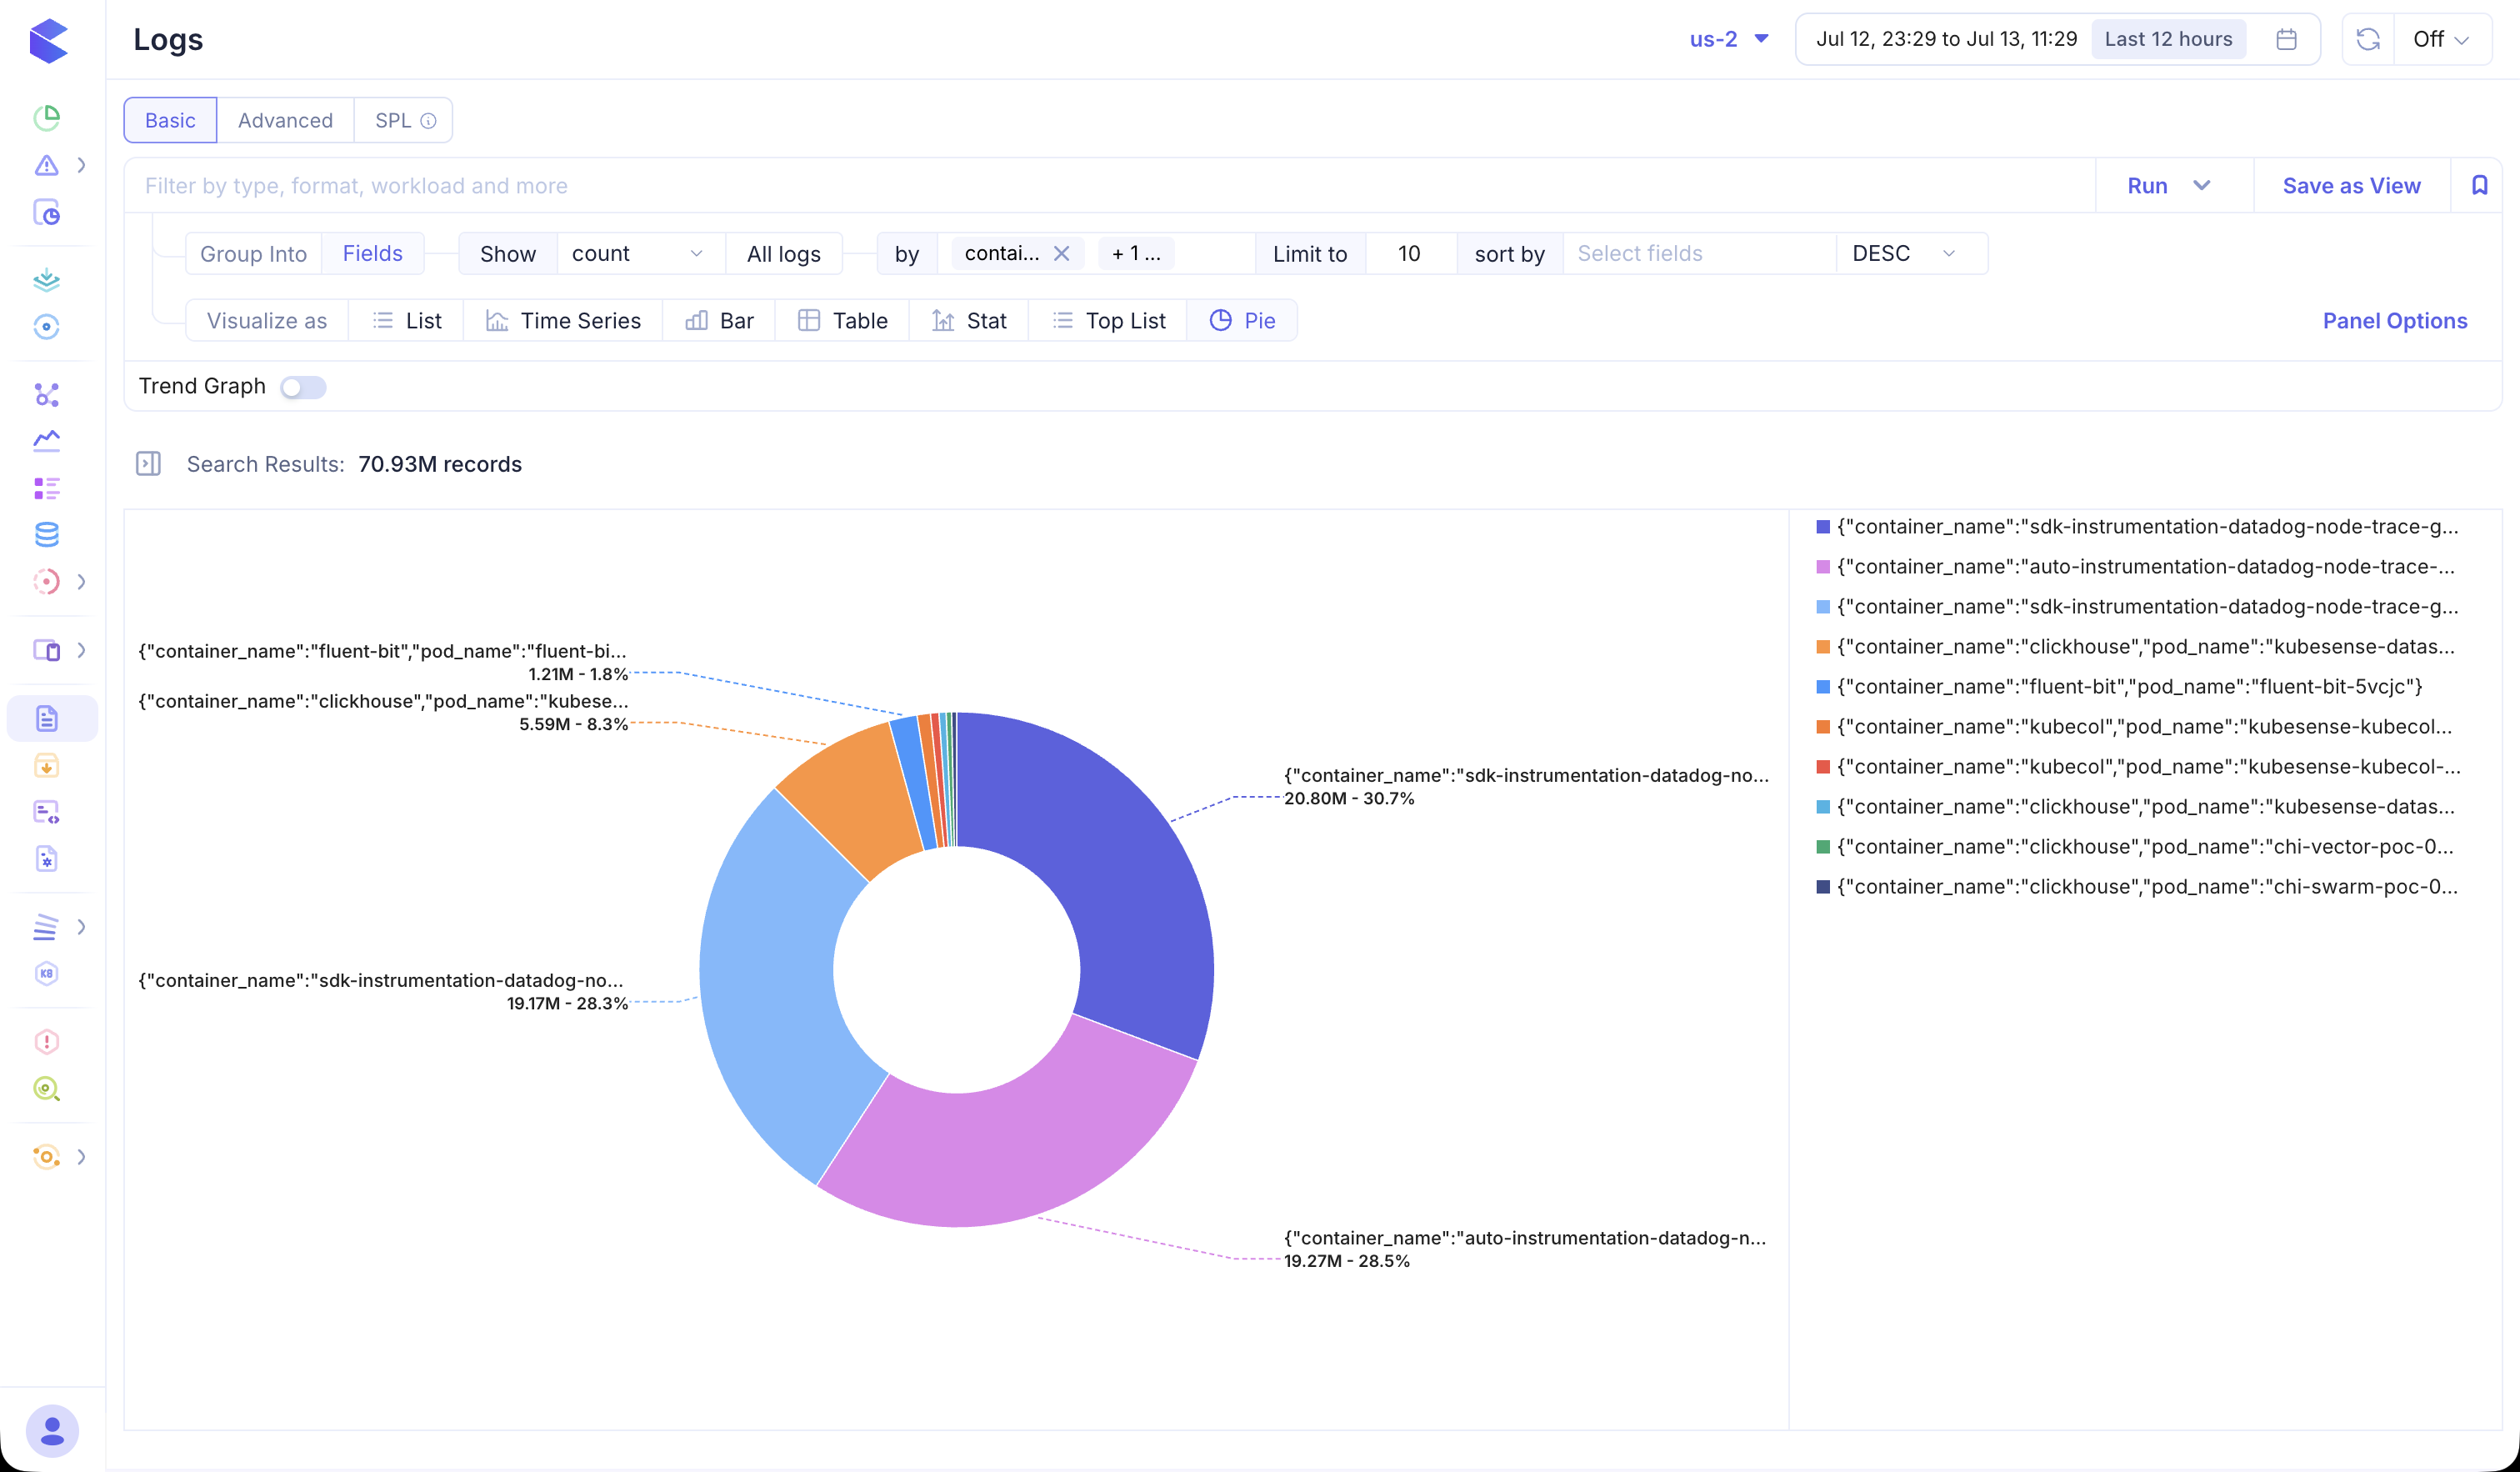
Pie
Shows proportional breakdowns across a group-by field.
Building a Visualization
- Open the Log Explorer and select a search mode
- Enter your query (or leave empty to explore all logs in the time range)
- Configure aggregation — for example Show
count, Group bycontainer_name, Limit to10, and SortDESC - Under Visualize as, choose a panel type (e.g. Time Series)
- Click Run to render the chart
In the Time Series example above, logs are counted and grouped by container_name, then plotted with a legend on the right.
Panel Options
To update the configuration of the current panel, open Panel Options (next to the visualization selector). Use it to set:
Panel Options
| Option | Description |
|---|---|
| Name | Display name shown in the panel header |
| Description | Optional description for additional context |
Standard Options
| Option | Description |
|---|---|
| Unit | Value formatter — auto-detect or choose from bytes, percentage, duration, and more |
| Color Palette | Color scheme for series, bars, or segments |
Legend Options
| Option | Description |
|---|---|
| Visibility | Show or hide the legend |
| Placement | Position the legend at the Bottom or Right of the panel |
You can also configure thresholds, graph styles (line width, fill opacity, stacking), and other options depending on the selected visualization type — the same controls available when editing panels in the Data Explorer.
Saving Views
After you have built a useful configuration, click Save as View to persist it. Saved views store your search mode, query, filters, aggregation settings, visualization type, and panel options so you (or your team) can reopen the same analysis later.
See Saved Views for visibility options (User vs Global) and management.
Create Dashboard
Once your panel looks right, you can promote it to a dashboard:
- Use Create New Dashboard (or add to an existing dashboard) from the Log Explorer
- The panel is saved with the same query and Panel Options configuration
- Open it anytime from the Dashboards section
Because Log Explorer and Data Explorer share the same panel model, you can refine a view here and then manage it alongside other metrics, logs, and traces panels on a shared dashboard.
Time Range
Use the time picker in the top bar to adjust the time window for your log search. Available options include:
- Preset ranges — Last 15 minutes, Last 1 hour, Last 4 hours, Last 24 hours
- Custom range — Select a specific start and end date/time
- Cluster selector — Choose which cluster to query (e.g., us-2)
The time range applies to all views — Table, Raw, and visualizations — and automatically updates the trend graph, filter counts, and search results.
Downloading Logs
Click the download icon in the table header to export the current log results. This is useful for offline analysis, sharing with team members, or archiving log data for compliance purposes.
What's Inside
| Section | Description |
|---|---|
| Log Table & Views | Table view, single-line/wrap-lines modes, raw view, and trend graph |
| Filters & Interesting Fields | Faceted filter panel and automatic field extraction |
| Search & Querying | Basic search, advanced SQL-like queries, and SPL |
| Log Detail View | Attributes, related logs, correlated traces, and infrastructure metrics |
| Saved Views | Save and share search configurations across your team |