
Top List
The Top List visualization displays a ranked list of values, ideal for identifying the highest or lowest contributors in your data.
When to Use
- Identifying top services by error count or latency
- Showing the most active endpoints or users
- Ranking categories by any aggregated metric
- Quickly spotting the slowest resources or highest consumers
Building a Top List Panel
- Open the Data Explorer
- Select your data source (Metrics, Logs, or Traces)
- Configure your query with a Group By attribute (see Query Builder)
- Set the Sort By and Sort Order to rank results (e.g.,
DESCfor top values) - Set a Limit to control how many items appear in the list
- Select Top List as the Panel Type in the right sidebar
- Click Run to render the list
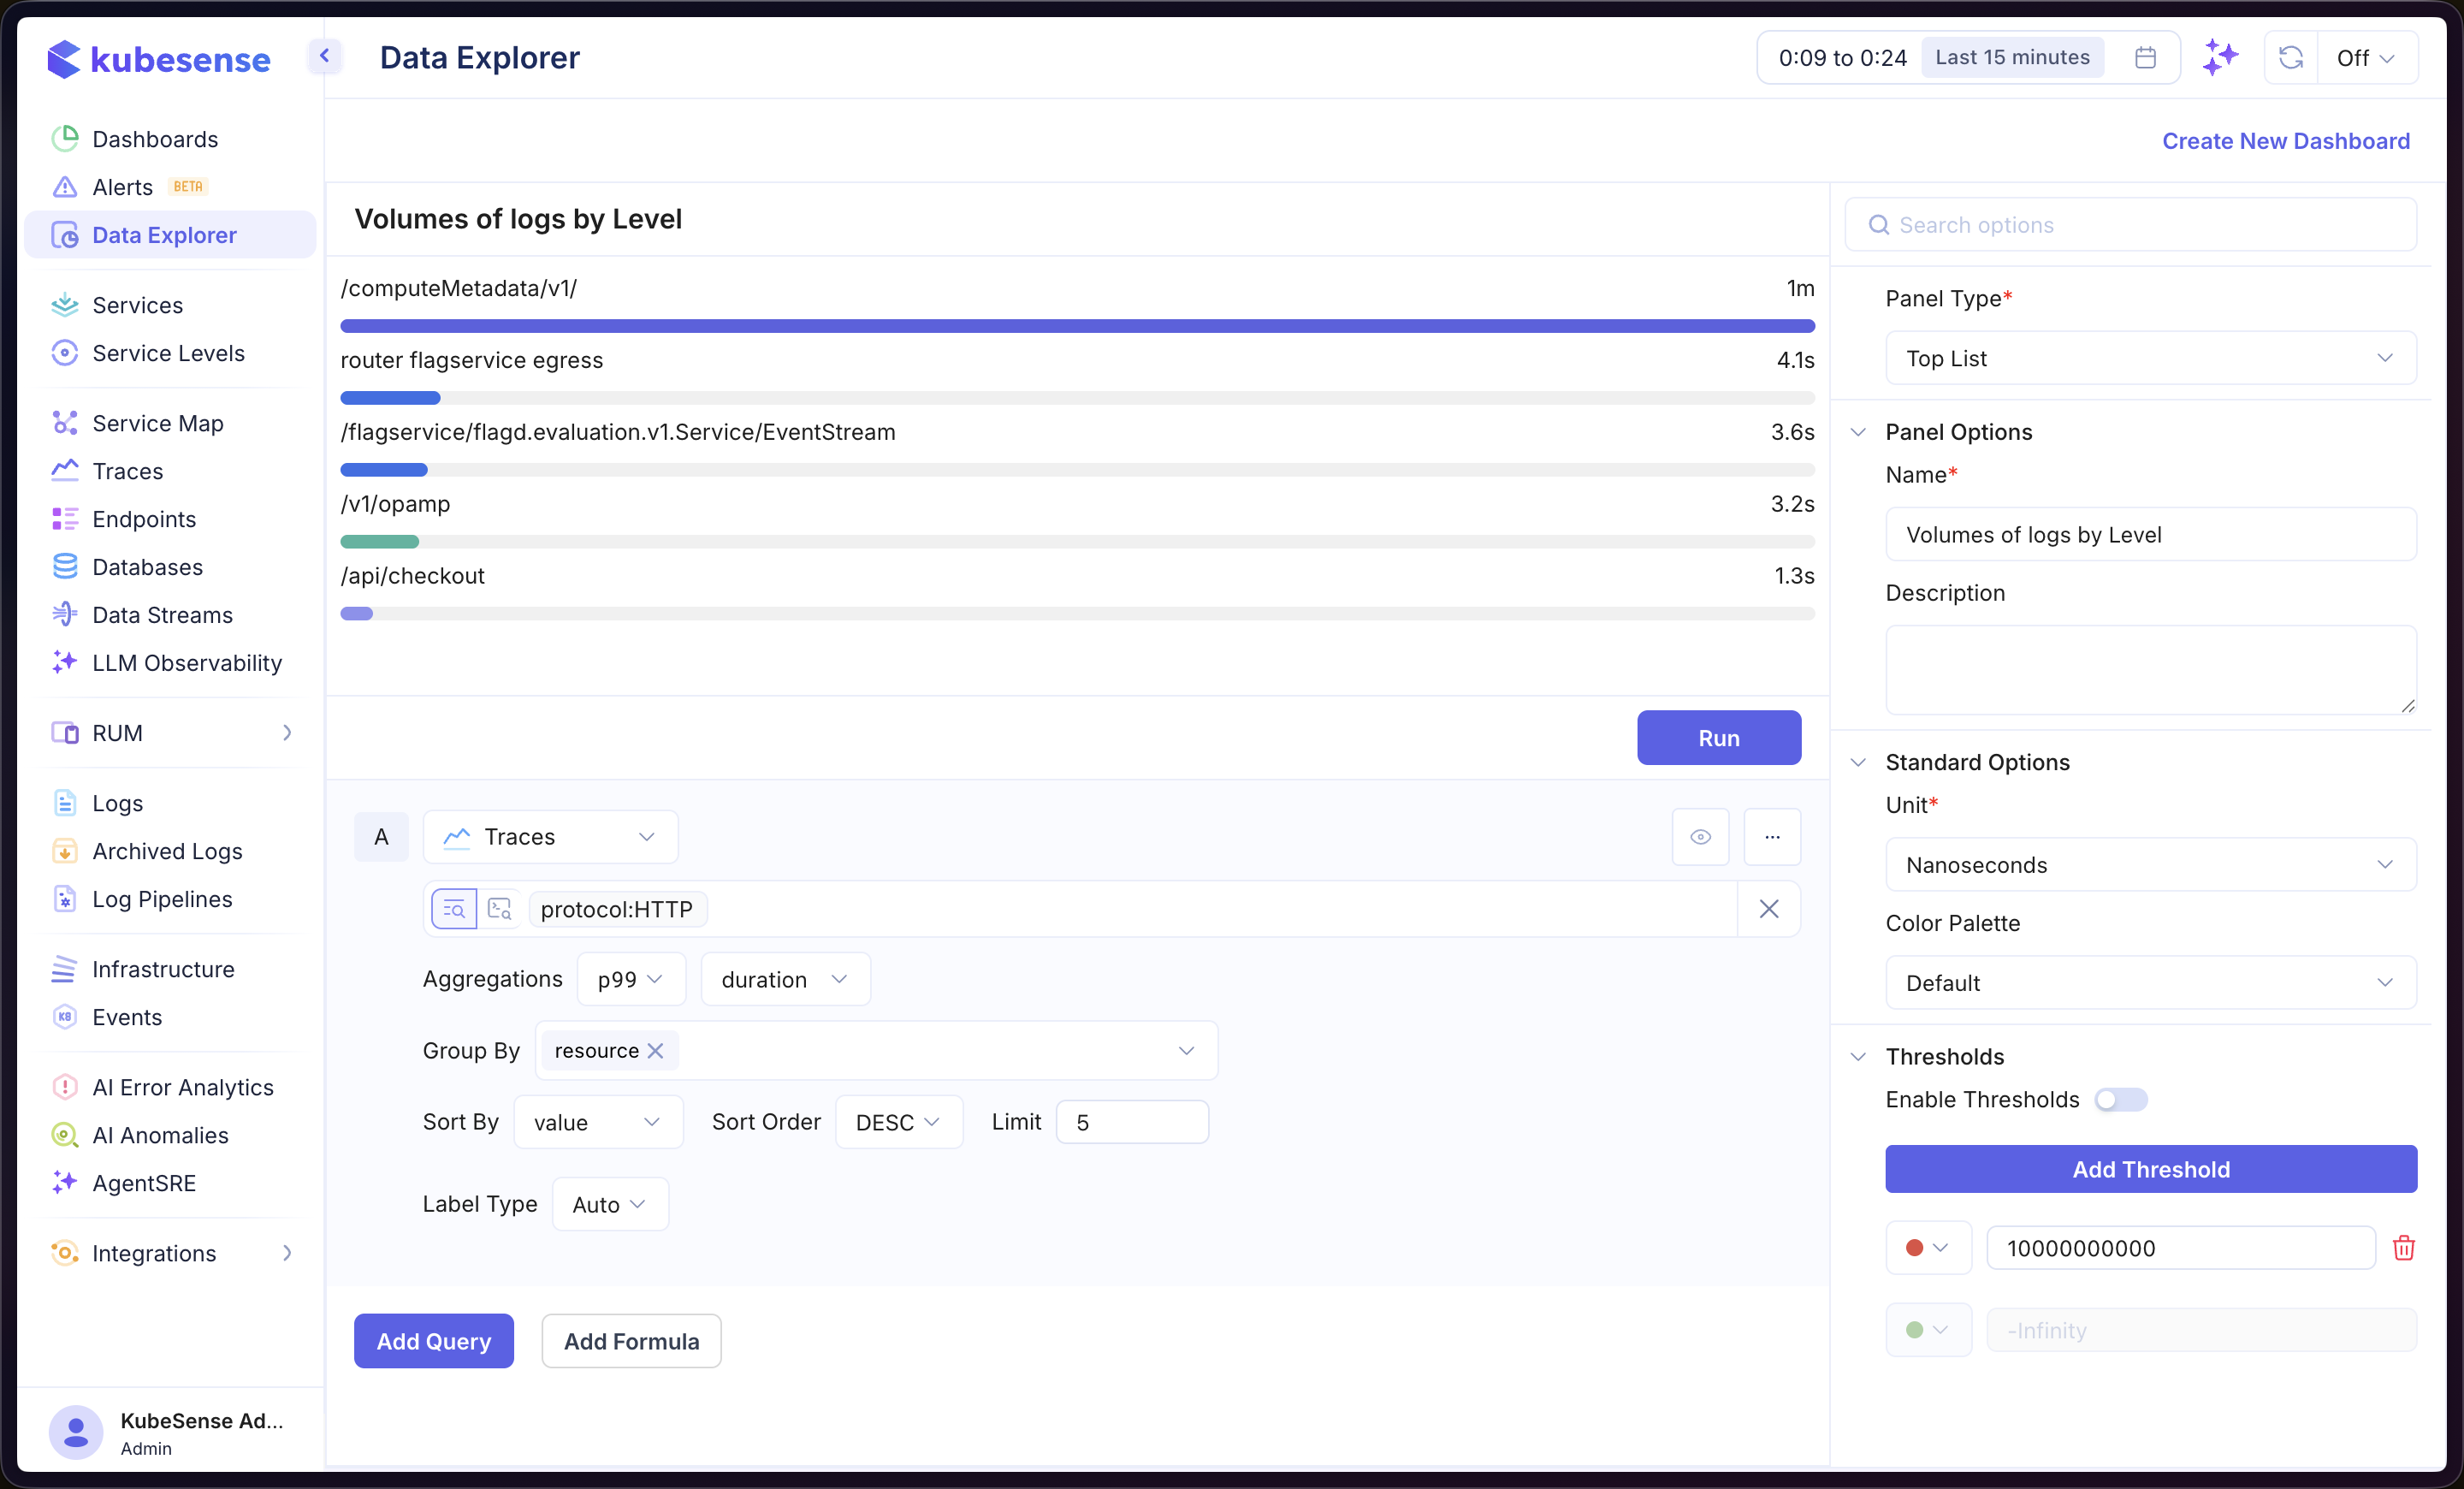
In the example above, the panel queries Traces data filtered by protocol:HTTP, with p99 aggregation on duration, grouped by resource. The list is sorted in descending order with a limit of 5, showing the slowest resources by P99 latency. Each row displays a horizontal bar proportional to its value.
Multiple Queries
Add multiple queries to combine ranked data from different sources. Each query is labeled alphabetically (A, B, C, etc.).
Each query can also carry its own Color, overriding the panel palette for that query alone. See Time Series — Query Colors.
Formulas
Use formulas to create computed rankings from your queries. Click Add Formula and enter an expression combining your queries (e.g., A / B). See Time Series — Formulas for more details.
Reading the List
Each row shows its value on the left and its name inside the bar, with the bar length proportional to the largest row. Every bar starts at the same point, so the lengths are directly comparable.
Hover a bar to see its detail in a tooltip that follows the cursor. In Stacked mode hovering does more — see Display Mode below.
Display Mode
A top list draws one bar per row by default. When your query groups by two or more attributes, you can split each bar by the extra ones.
| Mode | What it draws |
|---|---|
| Flat | One block per row, all in the same color. This is the default. |
| Stacked | The first Group By becomes the row; the remaining ones split its bar into blocks, one per combination, with a legend underneath. |
Set it under Top List Options → Display in the panel editor. The control is disabled until the query has a second Group By, since there is nothing to split by before that.
Removing a Group By from a stacked panel is safe: with a single attribute the panel draws flat again, and switching back restores the stacking.
Working with a Stacked List
Stacked lists are interactive, which is what makes a second dimension worth adding:
- Hover a block and that series lights up on every row, with the others dimmed — so you can read one series down the whole list at a glance.
- The left-hand number follows while a series is highlighted, showing that row's value
for that series instead of its total. A row with no block for it shows
-. - The legend under the list toggles a series on or off (click its swatch) or isolates it (click its name; click again to restore). Hiding a series re-scales every bar to what is left.
Hiding the legend under Legend → Visibility hides the toggles too; hovering still works.
Panel Configuration
Panel Options
| Option | Description |
|---|---|
| Name | Display name shown in the panel header |
| Description | Optional description for additional context |
Standard Options
| Option | Description |
|---|---|
| Unit | Unit formatter for the displayed values — choose from 100+ units including bytes, percentage, duration, requests/sec, and more |
| Color Palette | Color scheme for the blocks. Used per series in Stacked mode; a Flat list draws every row in one color. |
Top List Options
| Option | Description |
|---|---|
| Display | Flat or Stacked — see Display Mode. Disabled until the query has two or more Group By attributes. |
Legend
| Option | Description |
|---|---|
| Visibility | Show or hide the legend. Only drawn in Stacked mode, where it names the series and doubles as the show/hide control. |
Visual Formatting Rules
Color blocks by their value rather than by their series — the top-list equivalent of thresholds on a time series.
Open Visual Formatting Rules and click Add Condition, then set:
- Operator — one of
>,>=,<,<=,=,!= - Value — the number to compare against
- Style — a light red, yellow or green background, or a custom color of your own
Each block is judged by its own value, so on a stacked list a rule marks the block that breached rather than the whole bar. On a flat list the single block carries the row total, so the two amount to the same thing.
Conditions are evaluated in list order and the last one a value satisfies wins. A list
of rules reads as escalating — > 10 green above > 100 red paints a value of 500 red — so
put the most specific rule at the bottom.
Adding the first rule changes what color means on the panel: it stops identifying the series and starts reporting the value, so every block matching no rule takes a single neutral color and the legend's swatches follow. Remove every rule and the palette comes back.
Upgrading an older panel
Visual Formatting Rules replaces the Thresholds section on top-list panels. A panel saved with thresholds keeps rendering them until you add your first rule, at which point the rules take over. Nothing is rewritten, so you can leave existing panels alone.